Thursday, June 27, 2013

Recreation Of Shaanxo SUPER Dramatic Black Smokey Eyes

Today I have one of my favourite YouTube gurus makeup looks that I recreated. You may have seen a picture of this look that I posted on my Instagram here is my blog post on it. In her look she used black eye liner in her waterline I however wanted to do something different so I went for a purple eyeliner instead and made my lips glossy instead of matte. I hope you like my recreation.

 Shaaanxo is one of my favorite YouTube gurus and I love watching her video and she has such a cute accent, if you have not check out her channel, you should!


Images are a screen shot from Shaaanxo makeup tutorial video.


Products Used
Face
Maybelline Fit Me Foundation 355
Maybelline Fit Me Foundation 320
Maybelline Fit Me Concealer 30
Tarte Amazonian Clay BB Illuminating Moisturizer (eye area)
Ben Nye Banana Luxury Powder
Love & Beauty By Forever21 Bronzer
L.A. Colors Mineral Blush Autumn
Sephora Harmony Trio Bronzer Apricot
 
Brows
Make Up For Ever Waterproof Eyebrow Corrector #3
Maybelline Fit Me Concealer 30
 
Eyes
Too Faced Shadow Insurance Eye Shadow Primer
MAC Eye Shadow Swiss Chocolate (crease)
Maybelline Eye Studio Blackest Black (base for black shadow)
Too Faced Smokey Eye Shadow Collection Smokin Hot
Glamour Doll Eyes Behind The Scenes + MAC Eye Shadow All That Glitters (blended together)
MAC Pigment Vanilla (highlight)
Khroma Black Pencil Liner
NYX Jumbo Pencil Purple 618
Victoria’s Secret Bold Liner Night Owl
MAC Haute & Naughty Too Black Lash Mascara (upper lashes)
Too Faced Lashgasm Mascara (lower lashes)
Ardell Lashes 120 Demi
 
Lips
Maybelline Lipstick Red Revolution 630
MAC Lip Glass Strawberry Malt


Any YouTube gurus you think I should check out?


Tuesday, June 25, 2013

Guest Post | Urban Decay | Moondust Eyeshadow in MoonSpoon Ft. The Pretty Vain

Today I have a blog post swap with Amy from The Pretty Vain, I hope you will enjoy her review on UD Moonspoon this is one of my fave post from her :)


Urban Decay recently released a brand new eyeshadow collection called Moondust Eyeshadows, which feature intense hues, microfine sparkle and lush, 3-D metallics. I was lucky enough to be considered one of Ipsy's influencers so I received a full sized  Moondust Shadow in the shade Moonspoon in my May Glam Bag!

Urban Decay describes the new collection through this statement:
"These dazzling eyeshadows have a super-refined and incredibly sophisticated feel. Instead of chunky glitter, there are microfine bits of iridescent sparkles paired with intense hues and lush 3-D metallics. Moondust has a luxe, upscale vibe and a gorgeous, diamond-like effect that can’t be beat. We recommend you apply these eyeshadows with your fingers. For extra intense payout, try them wet."

Urban Decay | Moondust Eyeshadow in Moonspoon ($20) - is described as a "medium gray w/bright silver sparkle." It is absolutely gorgeous in the pan and somehow even more spectacular when swatched on your hand. I found that it applied smoothly on my arm when I swatched it and was rather pigmented, however the base colour was not completely opaque. I noticed that there was quite a bit of fall out, so it would be best to apply this shadow prior to the rest of your makeup regime and use it alongside a sticky primer.

This shadow is unlike anything else currently in my collection and is something I will definitely reach for whenever I have a special occasion to attend! 

Have you caught a glimpse of the brand new Moondust Eyeshadows from Urban Decay? Will you be purchasing any of the shadows from this collection?


 photo photo1_zps71fd852e.png
 

Good Morning Dolls! My name is Amy and I am the 23 year old beauty blogger in charge of theprettyvain, a blog that deals with everything beauty related! I am so happy that I got the opportunity to do a guest blog for Sheer Beauty, because I think Kayla is an amazing blogger who is always creating daring and beautiful looks that I only wish I could pull off. I hope that you enjoy my post and will head over to www.theprettyvain.blogspot.com for additional posts!
 
You can check out my blog or you can find me on these other sites:
Bloglovin: theprettyvain
Twitter: @theprettyvain
Instagram: @amymckissock
 
 
Amy, xo


Monday, June 24, 2013

Lash Love Love Affair Review

 
Today I have a review on Lashes from Lash Love, I was lucky enough to be sent a pair of the Love Affair lashes to review for my readers. Lash Love was Co-Founded by sisters April & Kristyl.

Here is some information about Lash Love from there website
 "We provide you custom handmade eyelash designs that range from incredibly natural looking to dramatically glamorous. Our 100% Mink Fur Strip eyelashes are crafted on an easy to take home and apply strip. These Mink Fur and Faux Mink strip eyelashes are long lasting and wearable over 25 times with proper care."

Also in the future with Lash Love if you can't find a pair of lashes you love or if you just want to make your own, you will be able to create your own custom pair of lashes with Lash Love, delivered in a custom packaging with your own name on it. I can't wait to try this out for myself! 
For more information about Lash Love check out the About Me section of ShopLashLove.com


Review
When I first opened up the box for the lashes Love Affair I thought wow these lashes look so glamorous, they are so beautiful and they looks and feel so soft. I couldn't wait to try them on. Lash Love lashes come in a white & gold box that closes with a magnet. The lashes came out of the case easy as well they were easy to remove from the plastic holder. I find with mink lashes you always  want to be gentle so when removing the lashes from the case I was gentle in taking them off and had no problems. The lashes fit well on my lid but later I decided to cut a bit off of the outer side of the lashes for more comfort. They blend in great with my natural lashes and there easy to take off. To clean the lashes I held them at the base with my thumb and gently with tweezers I removed the gule that was on them. Compared to regular lashes that I have tried the lash band is thicker on mink lashes. With lashes that are not mink the band is clear but with mink lashes that band is not clear and a bit thicker because the lashes are actually sewn into the band. The band also blends in perfectly with your black liner. Lash Love also offers Faux Mink Lashes as well as the 100% Mink Lashes.
 
Here is a picture of how much a cut off it was just a tiny bit and a cut them off after the first time I wore them.
 
 
Price
There are different price ranges for the lashes but I'm going to list the lowest price for the mink lashes and the faux mink lashes. To see all of the prices visit ShopLashLove.com
I also have a coupon code for you to get 20% off your order use code kayla20
 
$29.99 100% Mink Lashes
$9.99 Faux Mink Lashes
 
 
Here is a preview of two makeup looks I did using these lashes, you can see what they look like on.
I will post the looks at a later date with a list of the products I used.


Check out ShopLashLove.com and tell me what your favorite pair is... I really like 60s Hollywood
 
Don't forget you can use my coupon code kayla20 to get 20% off your order


  disclaimer: I was send this product to review and this in no way affects my thoughts on this product and I will always give my honest opinions on products or services I review.

Saturday, June 22, 2013

My Summer Day Essentials


Summer is here and this might surprise people but I'm actually not a summer person. At times I hate summer and I actually like winner and spring better. However in this post I'm sharing with you guys my summer essentials, during the summer I feel my skin gets more oily during my day and here are some products I use to help that and also just some general product I think are must haves for the summer.
 
 
Dove Visibly Smooth in Wild Rose is my favourite anti-perspirant, everyone needs a great anti-perspirant and this one helps your underarms to be stubble free. I have tried other Dove anti-perspirants like gosleeveless and I have to stay that was the biggest waste of money, it didn't last long and it was just a big waste of my money I tried it for over 2 month and it just didn't do anything good for me.
 
NYX Matte Blotting Paper, blotting paper is a must must must! This is a must especially if you have normal/oily skin or just plan oily skin. Blotting sheets are great to take with you in your bag and when ever I use one and offer one to my friends there always surprise by the oil that's comes off of their face. A must to keep your face shine free during the hot months.
 
Hawaiian Tropic Sheer Touch SPF 85, sunscreen is another must! I have a cousin who doesn't wear sunscreen at all and I think she being so stupid. She saw somewhere that sunscreen can actually help to cause skin cancer but I don't agree with that. I think it's important to wear sunscreen even though I don't reapply it as my day goes on which I should, I at least apply it before I go out. Here is a interesting article on laurenconrad.com that explains how SPF works it's not a long article so you should read it it's interesting. It explains what SPF actually means and how long your sunscreen protection actually last for.
 
Bath & Body Works Carried Away Fragrance Mist, I like wearing fragrance mist during the day there not so strong in smell or over powering like some perfumes can be. Plus with a mist they come in plastic bottle unlike perfume that are in glass bottles which can break. With a fragrance mist you can throw them in your bag and mist yourself again if need be.
 
Maybelline Dream Fresh BB in Deep Tint any face product with SPF is great to have. I like this BB cream over foundation because I don't usually wear or need foundation on a daily bases. Also sometimes I don't even wear BB cream so I apply a light layer of SPF on my face before I put on any makeup.
 
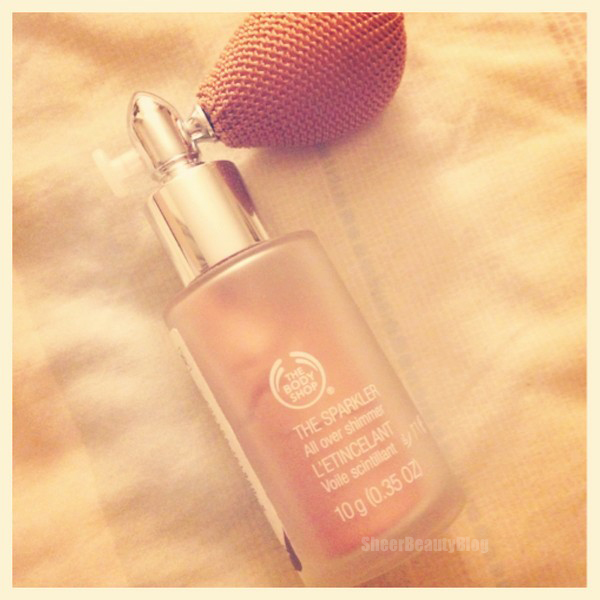
The Body Shop The Sparkler is a body shimmer and I like wearing this sometimes to give my skin a nice shimmer.
 
 
Ben Nye Banana Luxury Powder or any translucent powder is great product to have to keep your face matte I apply mine in my t zone because that were shine I think is most noticeable. This doesn't totally keep my face matte all day long put it does help.
 
Sephora Harmony Trio Bronzer, Benefits Sun Beam and Love & Beauty By Forever 21 Bronzer are the highlighter and bronzer that I currently use. I alternate between sun beam and trio. There both the same kind of golden shade but the trio bronzer is more opaque and sun beam is a liquid product. I use trio more because it blends better but when you get sun beam blended in while it looks more natural. Love & Beauty By Forever 21 Bronzer is one shade darker then my skin tone and I like it because it also more natural contour since is only a shade darker. I like wearing highlighters and bronzer to some what give a natural glow lol.


And that's my summer essentials, what are your summer essentials?


Thursday, June 20, 2013

FAR Botanicals Alcohol Free Cojoba Styling Gel Review

For the past week I have been trying out this product that I was so lucky to be sent by FAR Botanicals, I have never tried out a styling gel like this before. Click here to check out FAR Botanicals website for more information on their brand and the products they sell. You can also check out there Facebook page.
 
 
About The Product
Cojoba Styling Gel is a light coconut and jojoba oil base style setting gel. Which also functions as a moisturizing curl definer. Cojoba is formulated without Silicones, Plastic Polymers, alcohol, Mineral Oil, Propylene Glycol, Animal By Products, Artificial Colours, Oat, Wheat, Formaldehyde Donors or Parabens. Cojoba has 98% natural ingredients and is eco-friendly alternative to typical styling products. Jojoba oil, extracts of Bamboo, Linseed and Alcohol Free Witch Hazel help to boost the natural holding power with making hair sticky, greasy or flaky. The coconut oil in this product penetrates deep into the hair to increase its resilience and tensile strength. Cojoba also does not cause dryness and is light weight. Cojoba can also be used to detangle hair prior to washing.

How To Use
From FAR Botanicals website
FOR WET SETS AND SOFT TO MEDIUM HOLD:
On short to shoulder length hair, part hair into 2 or 4 inch sections using a quarter-size amount of gel for each. Increase amount for longer or very thick hair. The more product you use, a firmer hold will result. Cojoba™ is versatile and we encourage you to experiment to find the level of hold you desire. To avoid clumped hair comb product through strands, insuring even distribution. Once the product has been evenly distributed, set on rollers or otherwise style as normal. Use a dryer to shorten set time. After removing rollers, etc. lightly scrunch hair to soften if you find the hold to be too firm.

AS A CURL DEFINER:
On damp shoulder length hair, section hair into 2 or 4 inch sections and apply a quarter-size amount to each section. Using your fingers, distribute product evenly through each section being careful not to disturb hair’s natural curl pattern. Scrunch hair for greater definition. Lightly blow dry with a hood dryer or hand dryer with a diffuser attachment, or allow hair to dry naturally. If you find final hold to be too firm, simply scrunch hair to soften.


Review
I took picture of my hair at different times so you can see how my hair style held up though out my day, on two different days.
On this day I went out with my cousin to the mall, so I hair went through getting pulled on a bit when trying on clothes, which I have to say when I curl my hair and I'm trying on cloths in the mall my hair pretty much also loses a bit of my curls because my hair get a bit pulled on my the clothes I was surprise that this didn't happen so much with this product. In the picture below I didn't do too much on that day that would cause my hair to uncurl.
 

Overall I enjoy this product I think it smells great, its quick drying. Because this is a gel I was thinking that I would have to wait a while for this product to dry before I can style be hair but there was like not waiting time. From the time I put this product into my hair and comb it in, it was dry and ready for me to continue on in styling my hair. I believe this product has great hold and unlike a hair spray it leaves your hair soft and not hard. It's also easy to comb out at the end of the day and didn't leave any white flakes behind. Ever notice when you try to comb hair spray out of your hair it hurts or white flakes are left behind. I even ended up using this on my cousin and the first thing she said was this smell great, the next day I asked her what she thought and she liked it as well and mentioned it didn't dry out her ends which is a problem she has with some products.
 
Price
$18.31 CAN
$18.00 US
£13.49 Euro
R179.46 South African


Have you tried anything from FAR Botanicals before?


disclaimer: I was send this product to review and this in no way affects my thoughts on this product and I will always give my honest opinions on products or services I review.
  

Tuesday, June 18, 2013

May 27th Face Of The Day (FOTD)


Products Used
Face
Tarte Clean Slate Poreless 12-hr Perfecting Primer
Maybelline Dream Fresh BB in Deep Tint
Ben Nye Banana Luxury Powder
Love & Beauty By Forever21 Bronzer
Sephora Harmony Trio Bronzer Apricot
L.A. Colors Mineral Blush Autumn
Brows
Make Up For Ever Waterproof Eyebrow Corrector #3
Maybelline Fit Me Concealer 30
Eyes
MAC Paint Pot Indianwood (primer)
MAC Eye Shadow Swiss Chocolate
BH Cosmetics 120 Eye Shadow Palette 2nd Edition (brown and tan)
Glamour Doll Eyes Dirty Jeans
Victoria’s Secret Bold Liner Night Owl
Maybelline Illegal Length Blackest Black
MAC Haute & Naughty Too Black Lash Mascara

Lips
MAC Lip Glass Mall Madness


Monday, June 17, 2013

Splat Hair Chalk Review


I so badly want to dye my hair but because my hair is relaxed I don't want to risk damaging my hair and drying it out so I love the idea of hair chalk and I'm on the search to find a brand that works for me. The last time I tried hair chalk I use blue pastel chalk I had from when I took art in high school and it only lasted in my hair for a few hours. So I though I would give Splat Hair Chalk a try when I randomly saw it at Shoppers Drug Mart.


About The Product
Splat hair chalk last for the day, it's available in 5 different pastels colours violet sky which is the colour I picked up, silver moon, dusty rose, mint candy and midnight blue. Included is 1 hair chalk and 1 application sponge for part line and braided hair.
 
Review
To use this product on my hair I selected a strip of hair, spray my hair with hair spray and applied the chalk then finish with hair spray to set the product. The first time I did this I did it wrong because the colour fade from my hair fast. The second time I followed the instructions more carefully. When I applied the hair chalk I applied it a few times to the strip of hair to build up the colour. Which is what is suggested on the box. There is a sponge included but I didn't use it and I feel its kind of useless. I did notice when I would spray the hair spray to set the colour it would fade a bit. I suggest also to do this over a sink the first time I did this there was a little mess and the second time I decided to do this over the sink to prevent a mess. I also suggest wearing old clothes just in cast you get some product on your clothes. Overall I like how my hair looked but once again this didn't last long half way into the day this product fade from my hair. In the second picture you can see it starting to fade and I think my hair that has the chalk on it also looks a bit dry from the product which I didn't notice until I took pictures, so I guess my search continues.
 
Price
$9.49CA Shoppers Drug Mart
 
I also saw this hair chalk at Winners a few weeks later for half the price, so if you want to try out this hair chalk check out Winners first to see if they have it.


Have you tried Splat Hair Chalk?


Friday, June 14, 2013

Redish Orange Brown Eye Look


My cousin once again let me borrow her camera so I filmed a makeup tutorial, hope you guys will like it 24 minutes which I know is long but I hope you will still watch it.


Products Used
Face
MAC Pro Long Wear Concealer NW40
Love & Beauty By Forever21 Bronzer
L.A. Colors Mineral Blush Autumn
MAC Archie's Girls Flatter Me Pearlmatte Face Powder
Ben Nye Banana Luxury Powder
 
Brows
Make Up For Ever Waterproof Eyebrow Corrector #3
MAC Pro Longwear Concealer NW40
 
Eyes
Too Faced Shadow Insurance Eye Shadow Primer
MAC Eye Shadow All That Glitters
BH Cosmetics 120 Eye Shadow Palette 2nd Edition
MAC Eye Shadow Swiss Chocolate
Too Faced Lashgasm Mascara
MAC Haute & Naughty Too Black Lash Mascara
Maybelline Eye Studio Blackest Black
Red Cherry Lashes 213
 
Lips
Maybelline Lipstick Red Revolution 630
MAC Lip Glass Strawberry Malt


Thursday, June 13, 2013

Maybelline Eye Studio Review

 
About The Product
From Maybelline.com "• Oil-free formula holds highly concentrated pigments in a clear gel base
• Smudge-proof and waterproof for 24 hours • Most intense line for lasting drama • Safe for sensitive eyes and ophthalmologist-tested • Contact lens safe"
 
Review
First I'm going to start off with saying I do love this liner, its so black and I have heard that Maybelline Blackest Black is actually darker then MAC Blacktrack but I haven't actually seen this in person for myself to say for sure this is true. This product claims to be smudge and water proof and I have test that out in the picture above as you can see in the 3rd picture I smudge the gel liner and a good amount of product came off I also applied water to the swatch after wards in the 4th picture and a tiny bit more product came off. I don't think this product is smudge proof which I think is a good thing because some people like to smudge out there liner. As for this product being water proof I would have to say I don't think it's really that great of a water proof product. I will say this product does last all day long for me. Maybelline Eye Studio gel liner also comes with a brush I think to be honest you don't need the brush its a waste of money. The brush is actually in the shape of a lip pencil and it's flat. To me it seems more of like a lip liner brush and when I repurchase this product I think it's silly to keep having to pay for a brush I wont even use it a waste of money and I think a waste of the companies time to make and sell the brushes. I'm not sure if they sell this liner with out the brush as well but if they don't I think they should.
 
 
Price
12.09CA 
I got this from well.ca which is an online drug store.
 
 
What do you think of Maybelline's Gel Liner?
Are there any gel liners you think I should try?


Monday, June 10, 2013

Nail Art Featuring Born Pretty Pearls


Hey everyone today I have a nail art post for you featuring pearls that I was sent from Born Pretty.
Born Pretty is an online nail store they sell everything from nail polishes to nail dryers and a lot more other thing as well, if you have never been to there site I suggest you check it out all you nail art lovers and even if your not into nail art they also have other things you might like on there site like earrings, necklaces, cell phone cases etc.


About The Product
The pearls come in a white and clear case in the shape of a circle, the lid is not removable instead it spins around so you can open it to which ever pearls you want to use. I like that the lid is non removable because sometimes things happen and people knock over stuff and if this ever gets knocked over there is not a big mess to clean up. There are 12 sections of pearls in 3 sizes.
 
 
Price
$4.14 US
Born Pretty offers free shipping world wide and you can also use my code to get 10% off I don't get any commission from you using my code it just strictly for my readers to use if you like and if 10 or more people use the code Born Pretty might have a giveaway or contest for my readers, so this code is really just for you guys.


How To Pearl Nail Art
This nail art is pretty simple or at least to me it is. All you need is pearls or rhinestones, what ever you want. For nail polish I'm using a grey black polish, you also need a base polish, top coat polish and tweezers to help pick up the pearls
 
Step 1. Once nails are dry from your base polish apply 2 coats of nail polish to your nails, for the ring finger I made a crescent shape on my nail using a normal polish brush along my nail then I painted the rest of my nail. It does matter so much if the shape isn't perfect because no body is perfect right and you will not notice so much once the pearls are on your nails.
 
Step 2. Apply another coat of polish on one finger where you want to place your pearls, use your tweezers to help you place your pearls on your nails is best. Once your pearl is in place gently push down on it and move onto the next pearl. You want the polish to be wet when your doing this step that is why you would apply the polish on one finger first then do your pearls because the pearls need something to stick too.
Step 3. Once your done applying the pearls apply your top coat. Make sure to apply a good amount of top coats around and in between the pearls. Then once your done that move on to the next finger.


I hope you enjoyed this post! If you try this nail look send me your pictures on instagram @kaylaashleysb


disclaimer: I was send this product to review and or use, this in no way affects my thoughts on this product and I will always give my honest opinions on products or services I review.
 

LinkWithin

Related Posts Plugin for WordPress, Blogger...