Highlighting and contouring is the latest trend in the beauty world. And everyone wants to learn how to high light and contour. Well in this post I'm going to show you how to contour and highlight. This is a step by step pictorial made simple, anyone can do it and you only need two products! :)
You my think to highlight and contour you need some big palette with tons of different shades, but you don't all you need is a highlight shade and a contour shade that fits for your skin tone. Those other palette are for pros who need a ton of shades because they are doing makeup on countless different types skin tones/textures and they need those pro palettes, but you don't.
About This Product
*MUFE Pro Sculpting Duo is one of the newest highlight and contouring products. This product helps you to naturally achieve the look of a beautiful highlighted and contoured face. This product is talc free and is also a gel powder formula, this helps to give a seamless blend to the skin and also feels weightless on the skin. This product retails for $45 Canadian.
About This Product
A *Large Flat Blush Brush from MUFE brush for light powder application. This brush is created with synthetic hairs that replicate natural brush hairs. As well with this brush it pick up just enough pigments from the product to create a healthy glow to the skin. Perfect to highlight and contour with or to use with blush as well. Retails for $43 Canadian.
How To Contour & Highlight
The first step to contouring and highlighting the right way is to find your face shape. I'm an oval face shape but I will also add a face chart on how to contour for other face shapes at the end.
I'm starting off with almost bare face. I have my concealer on with setting powder, as well my brows done and mascara.
Place your 156 brush onto your highlight shade. First we care going to start with highlight and this is so that you can see the effects of your highlight and then you can contour afterwards. You may find after wards that you don't actually need as much of the contour shade that you would use if you contoured first and then highlighted
With you brush highlight the cheekbones and above the brow
Next with your finger tip highlight your brow bone
Highlight your chin
As well the bridge of your nose
As well the forehead
And last highlight your cupids bow
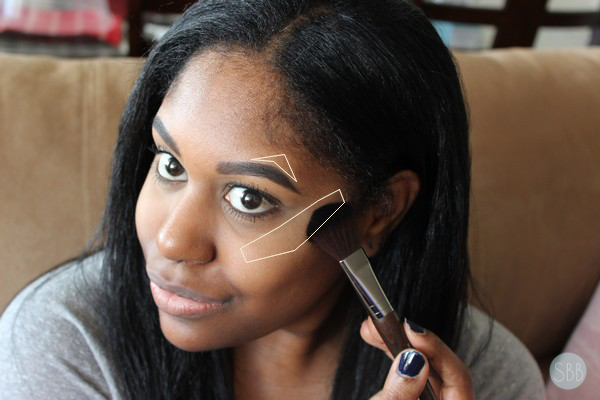
Now onto contouring dab that brush into the contour shade and apply is under the cheek bones and above the side of your brow
Next is to contour your jawline and chin
Last contour your nose using your finger tip, you can use the brush if you like however I personally like using my finger tips.
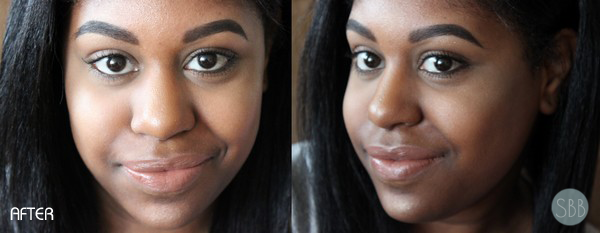
The Make Up For Ever Pro Sculpting Duo us prefect for contouring and highlighting, and I would recommend this product for beginners to advance users of makeup.
Hope you enjoyed this post, let me know!


This is really useful, contouring made easy! :D
ReplyDeleteYup!
DeleteGreat tips thanks hun!
ReplyDeleteXoXo One Stiletto At A Time
Your welcome :)
DeleteGreat post! Love that Palette! Xx
ReplyDeleteThanks Jacenda!
Deletevery nice highlighting color
ReplyDeleteReally helpful post - and the products look great too!
ReplyDeletesophie-said.blogspot.co.uk
wow I didn't know that makeup forever had contouring products - will definitely need to check these out!
ReplyDeleteRae | love from berlin
makeup forever products are soo good! and love the way you show us as well! Great post! xx
ReplyDeleteAnisha ♥ All You Need Is Red Lipstick
Looks great! This is such a wonderful post <3
ReplyDeletexx Bash | Bash Says Hey | bloglovin'
I think this is one of the best guides I've seen, I am so rubbish at contouring and highlighting, so thanks for this!
ReplyDeleteThe Velvet Black // UK Style & Beauty Blog
Well done, Kayla :-)
ReplyDeleteMaybe sometime you can surprise us with a video tutorial?
Much love to you!
xoxo!